I got the idea to do this because of Jjacks48 on youtube's latest mission "project 48". Her latest video was on nail marbling. So I decided to give it a go and take some pictures for you guys. :)
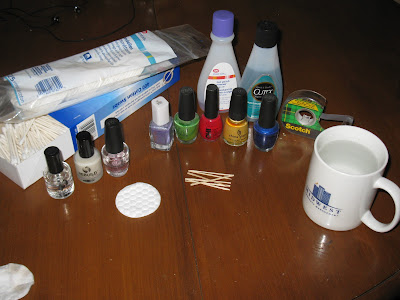
The arsenal! Tooth Picks, Cotton Swabs, Cotton Pads, Nail Polish Remover, Tape, Prep/Finish Polish, 4-5 Different Colours of Nail Polish, and Water in a cup you don't mind ruining.
Step 1: Prep Your Nails
I've applied Seche Rebuild as a nail strengthener, and OPI Base Coat to prepare my nails.

Step 2: Tape off the parts you don't want polished, side walls, cuticle, etc... You can also opt for Vaseline on these parts as well, I just don't have any on hand right now.

Step 3: Let drops of polish fall randomly into the cup of water.

Step 4: Take a toothpick and swirl them together.

Step 5: Stick your finger in there, hold it there for a while to let the polish stick to your nail.

Step 6: Remove your nail carefully. (I was lazy and didn't put tape on my thumb)

Step 7: Let it dry.

Step 8: Carefully remove the tape and use the cotton buds and cotton pads to clean up any polish that may have stuck to your skin. Finish with a top coat and you're done!

I stuck with primary and secondary colours, they tend to compliment each other easily. Every nail is different and I love it! I hope you do too!
Super cool! I'm going to try it today. Will send you pics!
ReplyDelete